When most people hear the word twitch, the first thing that comes to their mind is thousands of people watching a live stream on their screens. But not all Twitch users want to present their content in front of the world, and they wonder how to private Stream on Twitch.
By any chance, if you also want to share your live stream with a limited audience, you’re in the right place, as this post is all about private streaming on Twitch. We’ll explore how you can host a private stream, its benefits, and other platforms you can use for private streaming.
For good measure, we’ve also thrown in some expert tactics there for making a private stream successful and things to consider before starting a live stream, so bring all your focus to one point and dive in.
Benefits of Twitch Private Stream
Besides keeping your live Stream limited to a specific audience, private streaming on Twitch has other advantages as well. Following are some of the salient benefits of a Twitch private stream:
- You can set up a private stream on-demand for your subscribers and make money through it.
- Start a private stream dedicated only to your subscribers, so they feel special and intrigue the rest of your audience to subscribe.
- It helps avoid copyright strikes if you’re using someone else’s content in your Live Stream.
- You can hold a contest or a giveaway on your account and set up a live stream just for the winners to interact with them.
- By allowing a specific audience to watch your live stream, you get to bond with them on a personal level, which helps you understand the audience and improve your content.
There can be many other lucrative and growth-relevant benefits of private streaming on Twitch, but we mentioned these because they are the most convincing ones. Now, if you think these advantages are a good reason to start a private stream, then let’s move on to the next step.
How to Set Up a Test Stream?
It’s always a good idea to do a test run before doing anything for real, right? That’s why Twitch allows its users to set up a Test stream in order to check their internet connection and find out what their live Stream looks like when they actually host it with the audience.
So, how to set up a Test Stream on Twitch? Well, that’s where the Twitch Inspector comes in. This tool was launched by Twitch to make it easier for the users to test their stream quality before going in for real. Here’s how you can start a test stream using Twitch inspector:
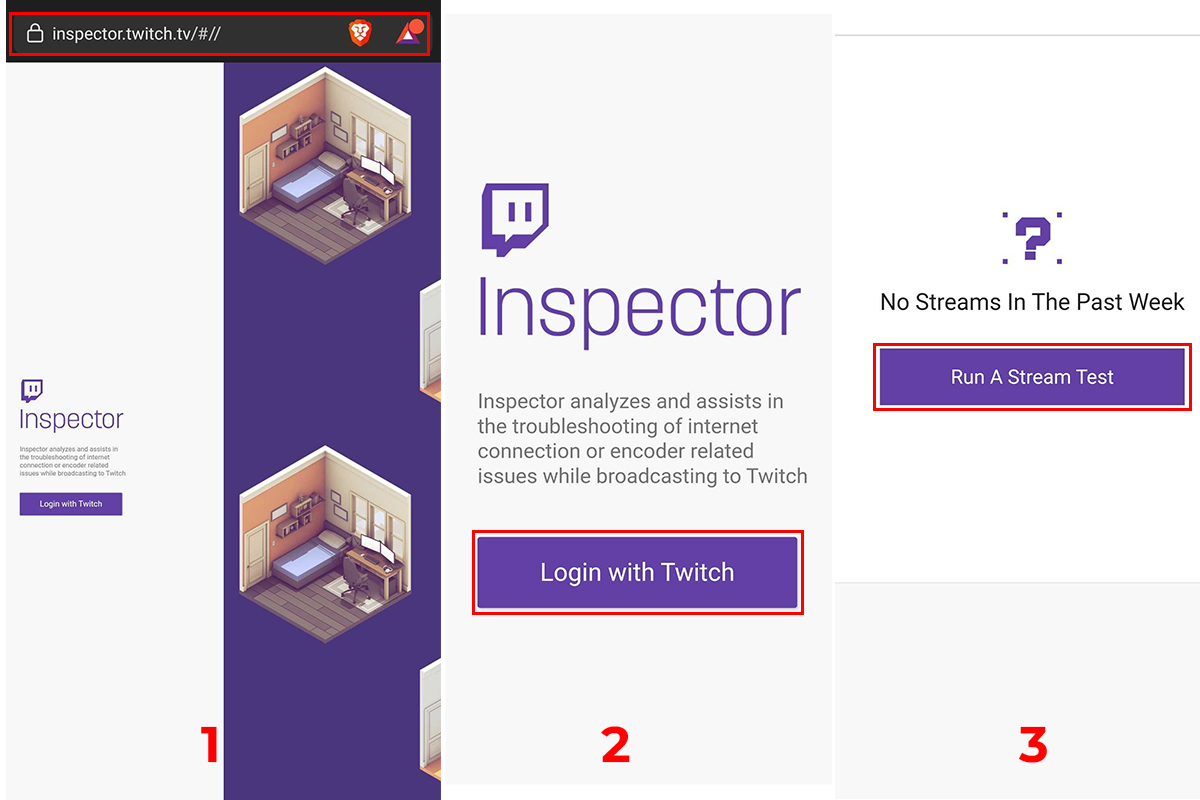
Step 1: Go to the URL “Inspector.twitch.tv“
Step 2: Now, “Log In“ to your Twitch account and give the Inspector access to your account.
Step 3: After logging in, you’ll see a dashboard in front of you. Click on the Purple button with the title “Run A Stream Test.”
Step 4: You’ll be asked to enter your Twitch stream key, which you can “Copy from Your Twitch Dashboard.”
Step 5: After that, go to your OBS software’s dashboard, and in-stream settings set it to “Stream To Custom Ingest,” which will allow the inspector to access the live Stream.
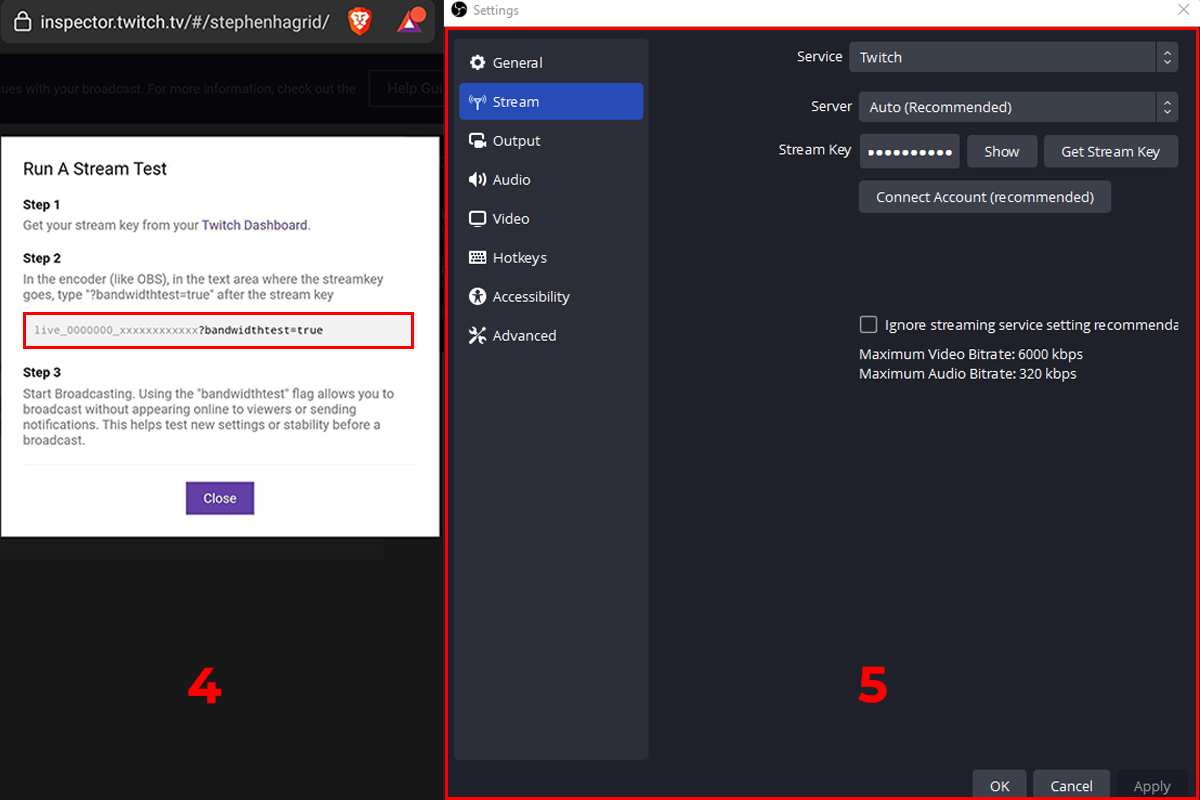
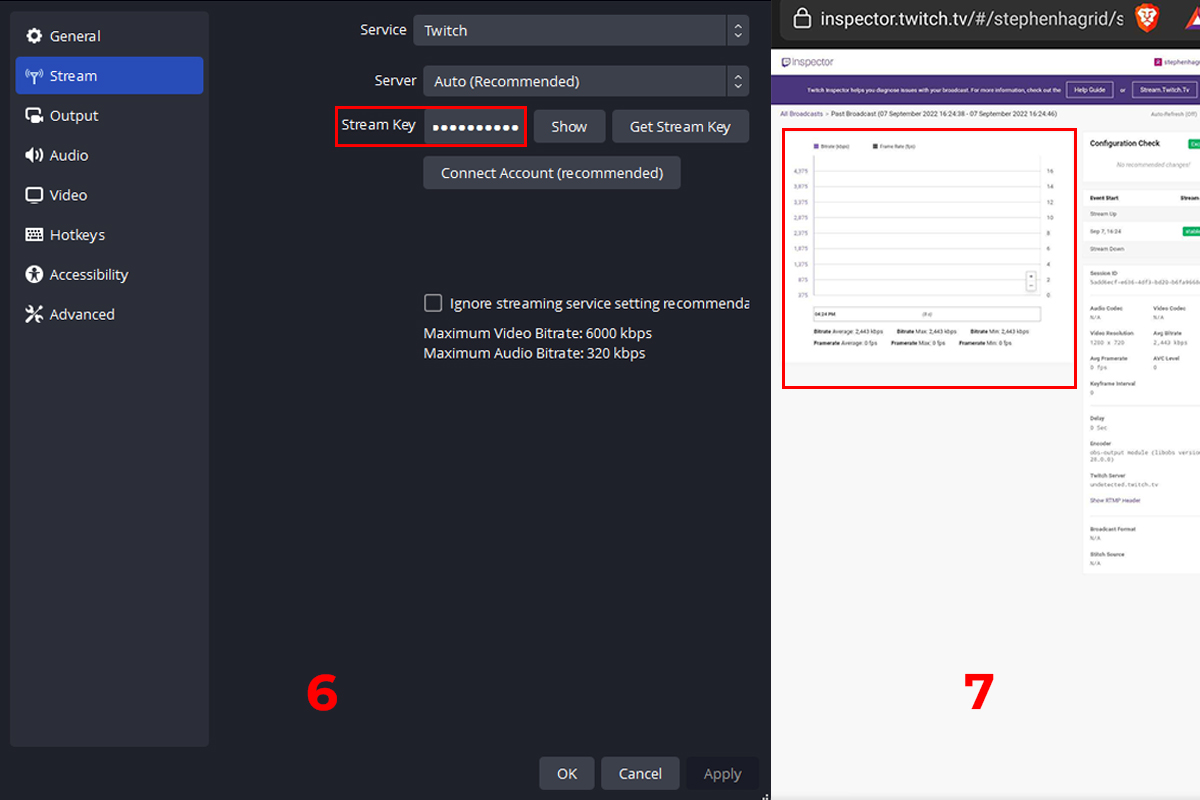
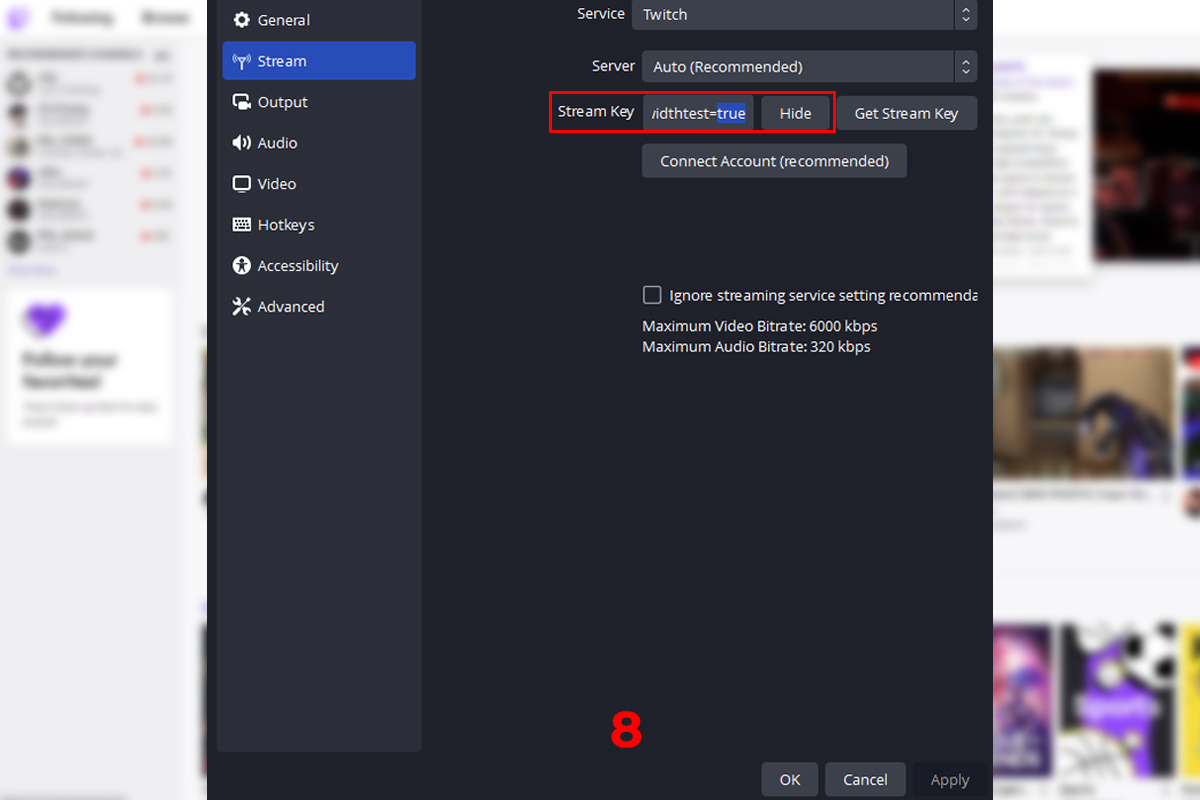
Step 6: Now, paste your “Stream Key” in the field, and after that, add ?bandwidthtest=true. This allows the inspector to run a bandwidth test in the Live Stream.
Step 7: Once you’ve added the key, go to like OBS and click on <strong”Go live.” The inspector will start analyzing your Stream.
Step 8: After you get the results, go back to the stream settings of your OBS and rest it to recommended settings.
That wasn’t so hard, right? Doing a private stream test beforehand makes you feel confident during the actual live Stream, and you communicate with peace of mind without the fear of getting cut off in the middle lingering in your mind.
How to Private Stream on Twitch?
Finally, it’s time to fire up the engines and find out how you can start your very own private stream on Twitch. There are three common methods you can use to hold a private stream on Twitch; all of them are effective but are different depending on the nature of your Stream.
Here’s a complete guide to setting up each of these streams, so pay attention and read thoroughly to absorb everything.
1. Stream with a New Account
The first way of hosting a private Twitch stream is by going live through a new account. Just Sign up for a new Twitch account and start a live stream with no title tags, category, or any sort of information, so it becomes impossible for anyone to find and see it.
But the truth is that you can’t call it a private stream in principle. Why? Because even without any information, it’s still somewhere at the back of the Twitch algorithm, and it might recommend it to some random viewers, and your Stream won’t remain private anymore.
This method is easy to apply but not very effective in terms of privacy. That’s why the pros don’t use it, but if you’re still new in the game and want to build your confidence by seeing how you speak and perform during a live stream, feel free to use this tactic.
2. Subscribers only Streams
As the name represents, a subscribers’ only Stream is the Live Stream which can only be seen by the people who have subscribed to your channel. You can call this a semi-private streaming type as it narrow downs people but doesn’t allow you to be very selective in terms of audience.
Still, it’s a very good way of communicating with your subscribers and keeping your audience engaged. It even intrigues your regular viewers to subscribe, so they too can access your limited streams.
To start a subscribers-only Twitch stream, go to the edit stream info section and set the audience to subscribers only That’s all you have to do! Now, it sure is easy to set up these streams, but you need to meet the following requirements:
- Your account should not be in violation of Twitch Community Guidelines in any way
- You must become Twitch affiliate or a partner
- You should have a record of Broadcasting live Stream for 90 days without violating the community guidelines even once.
If your account meets these criteria, go ahead and start a subscribers-only Stream right away if you want.
3. Password Only Streaming
A password-only Stream is what you can call a truly private stream that can only be accessed by the people you choose. You can set a password or even two-factor authentications on your Stream to keep your audience limited.
Unfortunately, this feature is not available on Twitch anymore, but it sure is available on other platforms, and you can use it to live Stream there privately.
How to Stream on Other Platforms?
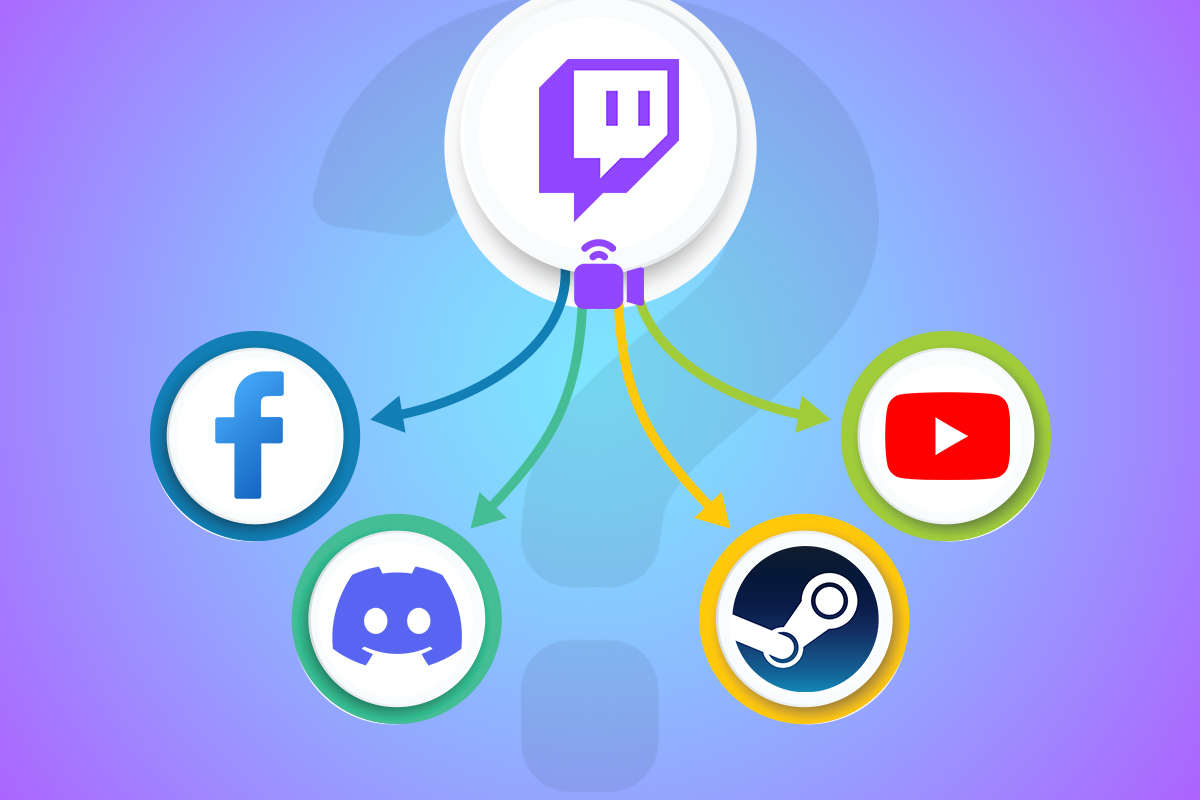
If you don’t find twitch very secure for private streaming, then you have other options as well. You can use video streaming services and even social media sites to hold a private stream. Let’s see some platforms that are favorable for private streamers.
1. YouTube
Starting a private live stream on YouTube is pretty easy and doesn’t require much effort. You just have to set your live Stream as unlisted instead of public, and then you can share the link of your Stream with the people you want.
2. Facebook
You can use Facebook gaming to hold a private stream, and although it doesn’t have any features related to private streaming, it can still be very useful.
You just have to create a new page first and then invite the people in front of which you want to hold the private Stream. Once they are there, start the live Stream, and only those people will be able to see your Stream. Again, not entirely private but functional!
3. Discord
Among all the streaming platforms, Discord is the one that allows you to hold a private stream easily. You just have to create a Discord server, and you can invite people you want to share your Stream with. So far, Discord has been the best platform for private streamers, so try it.
4. Steam
Steam is a platform famous among gamers for buying games, but now you can broadcast your live Stream privately on it as well. Just follow these steps:
Step 1: Open your Steam software and go to “Settings.”
Step 2: Click on “Broadcasting”, and you’ll see a dropdown.
Step 3: Select the “Privacy Settings” option and set it to the option that says something like “friends can request to watch my games.”
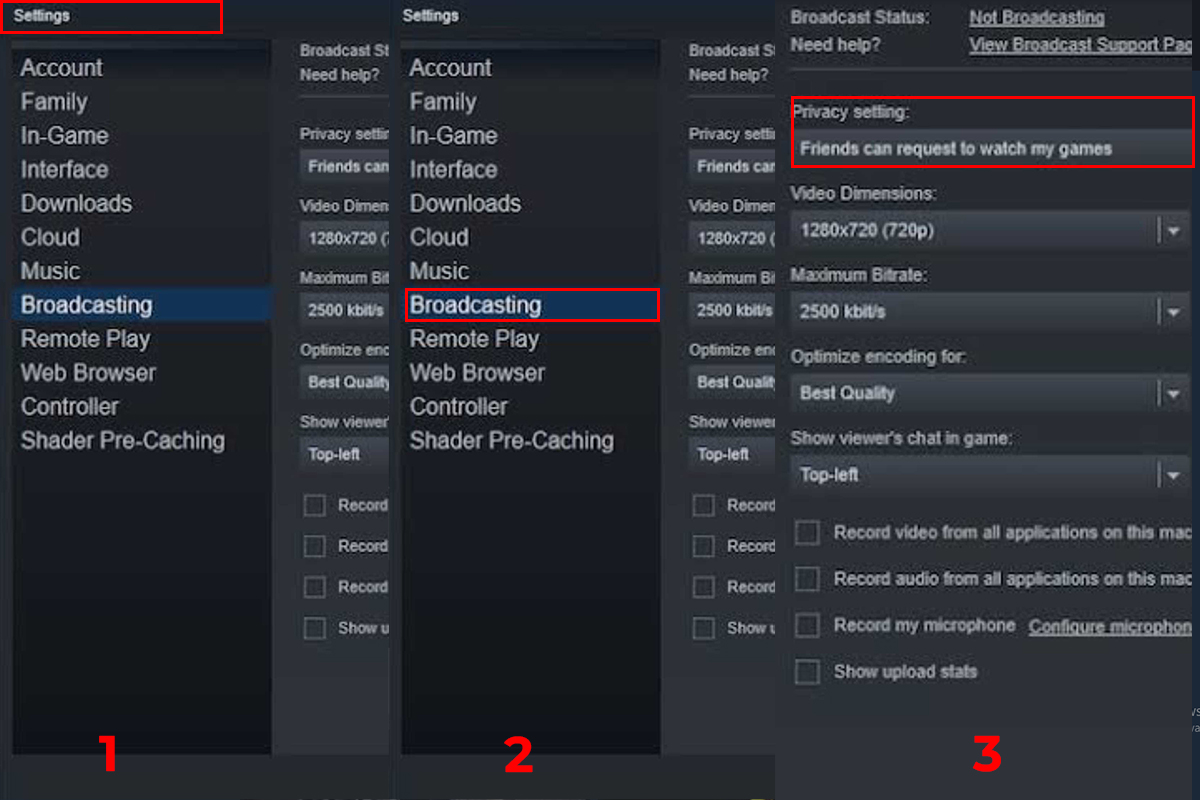
Doing this will allow only your friends to access your streams, and then it’s your choice whether to accept their request to see the Stream or not.
Things to Consider Before Going to Stream on Twitch
To become a better streamer, you always need to strive for better and keep improving your stream quality. Now you can do that if you keep a couple of things in mind and stay on top of them to make your every Stream successful. Some of them are described below:
1. Stable Internet
Any streamer’s worst nightmare is when they get cut off in the middle of a stream due to a bad internet connection. Therefore, make sure to install a fast and reliable internet connection at your streaming site, so you can stream without any fear lingering in your mind.
2. Software
When it comes to streaming on Twitch, the software can make all the difference. What kind of encoder you’re using can determine how smooth your Stream will go and in how many FPS your viewers will be able to enjoy your content. That’s why always be careful while selecting streaming software for your Twitch streams.
Here are some suggestions by the experts:
Twitch Studio: This software is highly recommended for PC streaming as it’s developed by Twitch itself and ensures a very smooth stream. It’s still in open beta but will be launched to the public soon.
OBS Studio: OBS is the people’s choice for Twitch streaming and is a good choice for you if you’re still new to the streaming game.
Stream Labs OBS: This software is also gaining popularity due to the unique streaming feature it offers, but it only works on Windows, so it’s a big no for Mac users.
Re-Stream: It’s perhaps one of the most versatile kinds of broadcasting software ever. It allows you to integrate analytics for keeping an eye on viewers and visitors, a chatting feature to communicate with fans, and of course, the broadcasting feature to go live.
V-Mix: With its advanced and complex features, V-Mix is software that you should only use when you think you’re ready to take things to an advanced level in streaming.
3. Good Setup, Excellent Mic, Spectacular Camera
Twitch is still far away from providing 4K streaming with excellent video quality, but still, you do need a good system to make sure that your Stream runs smoothly without any lagging. This is especially vital for you if you’re planning to live stream games on Twitch.
In this case, you need to pay extra attention to factors like the RAM and Graphics card of your PC to ensure that theirs is enough to power in the CPU to run the game smoothly and handle the live streaming as well.
After that comes the most important element of Live streaming, a good Mic. Find yourself an affordable microphone with good sound quality, so your viewers can listen to your commentary clearly and enjoy the gameplay while being amused.
In the end, you might need a good camera as well during your Stream. Most streamers don’t show themselves during the live Stream, but if you want to use your face value for getting more viewers, then get yourself a DSLR for live streaming.
Five Ways to Improve Your Private Twitch Stream
More than 9.2 million people stream on Twitch every month, and this number has constantly been increasing since the pandemic. Now, hosting a successful private stream among so many people is sure hard, but here are five tips you can use to improve the quality of your private streams.
1. Build Your Reputation on the Platform

In the saturated market of Twitch, to rise in the ranks and be different from the rest of your competition, you need to build your reputation on the platform. You can do that by:
- Using a unique style of commentary
- Engaging with the audience directly in a live stream
- Staying gentle and friendly at all times
- Coming up with a clever logo for your Stream which gets stuck in the viewers’ minds, and they always remember you.
By ensuring these elements, you’ll be able to set yourself apart from the competition, and it will build your reputation as one of the best streamers on Twitch.
2. Consistency is the Top Priority
To be successful on Twitch, you need to make sure that you stream consistently. At the start, you might only get 5 or 6 viewers, but eventually, this number will increase if you stay consistent and give your audience something to watch regularly.
Besides, your private streams will gain more popularity when you have a great fan following due to your consistency. People will want to know what you’re doing in the private Stream, and they would do anything to gain access to it.
3. Socialize with Fellow Streamers
Make sure to establish connections with other streamers of your niche and try to collaborate with them for mutual benefit. This mixing will also help you learn from your fellows, and you’ll be able to improve your streams by getting lessons from them, so open up and socialize.
4. Keep an Eye on the Analytics
It’s important for a streamer to know his progress and to understand which of his actions are affecting his Stream. That’s why you need to keep an eye on your analytics like viewers you’re getting, your subscriber count and regular viewers, etc.
These stats won’t flare up overnight, but if you keep at it, they will keep improving consistently, and soon you’ll become a renowned name in your niche for streaming.
5. Be Original and Gentle
Don’t be pretentious during a live stream, and try to be who you are while talking about the game and experience. Also, try to be as gentle as possible, so your audience stays interested in your commentary and gets impressed by your manners.
Your personality helps build your reputation on Twitch, and if you’re cool and gentle, you’ll start getting more and more subscribers in no time.
Conclusion
We hope that you enjoyed today’s article and found it helpful in your quest to set up a private stream on Twitch. If you have any confusion regarding any part of this post, write it down in the comments section, and we’ll try to explain it to you as best as we can. For more updates, subscribe to our newsletter and follow our social media pages.

Leave a Reply